
AUD/CHF:
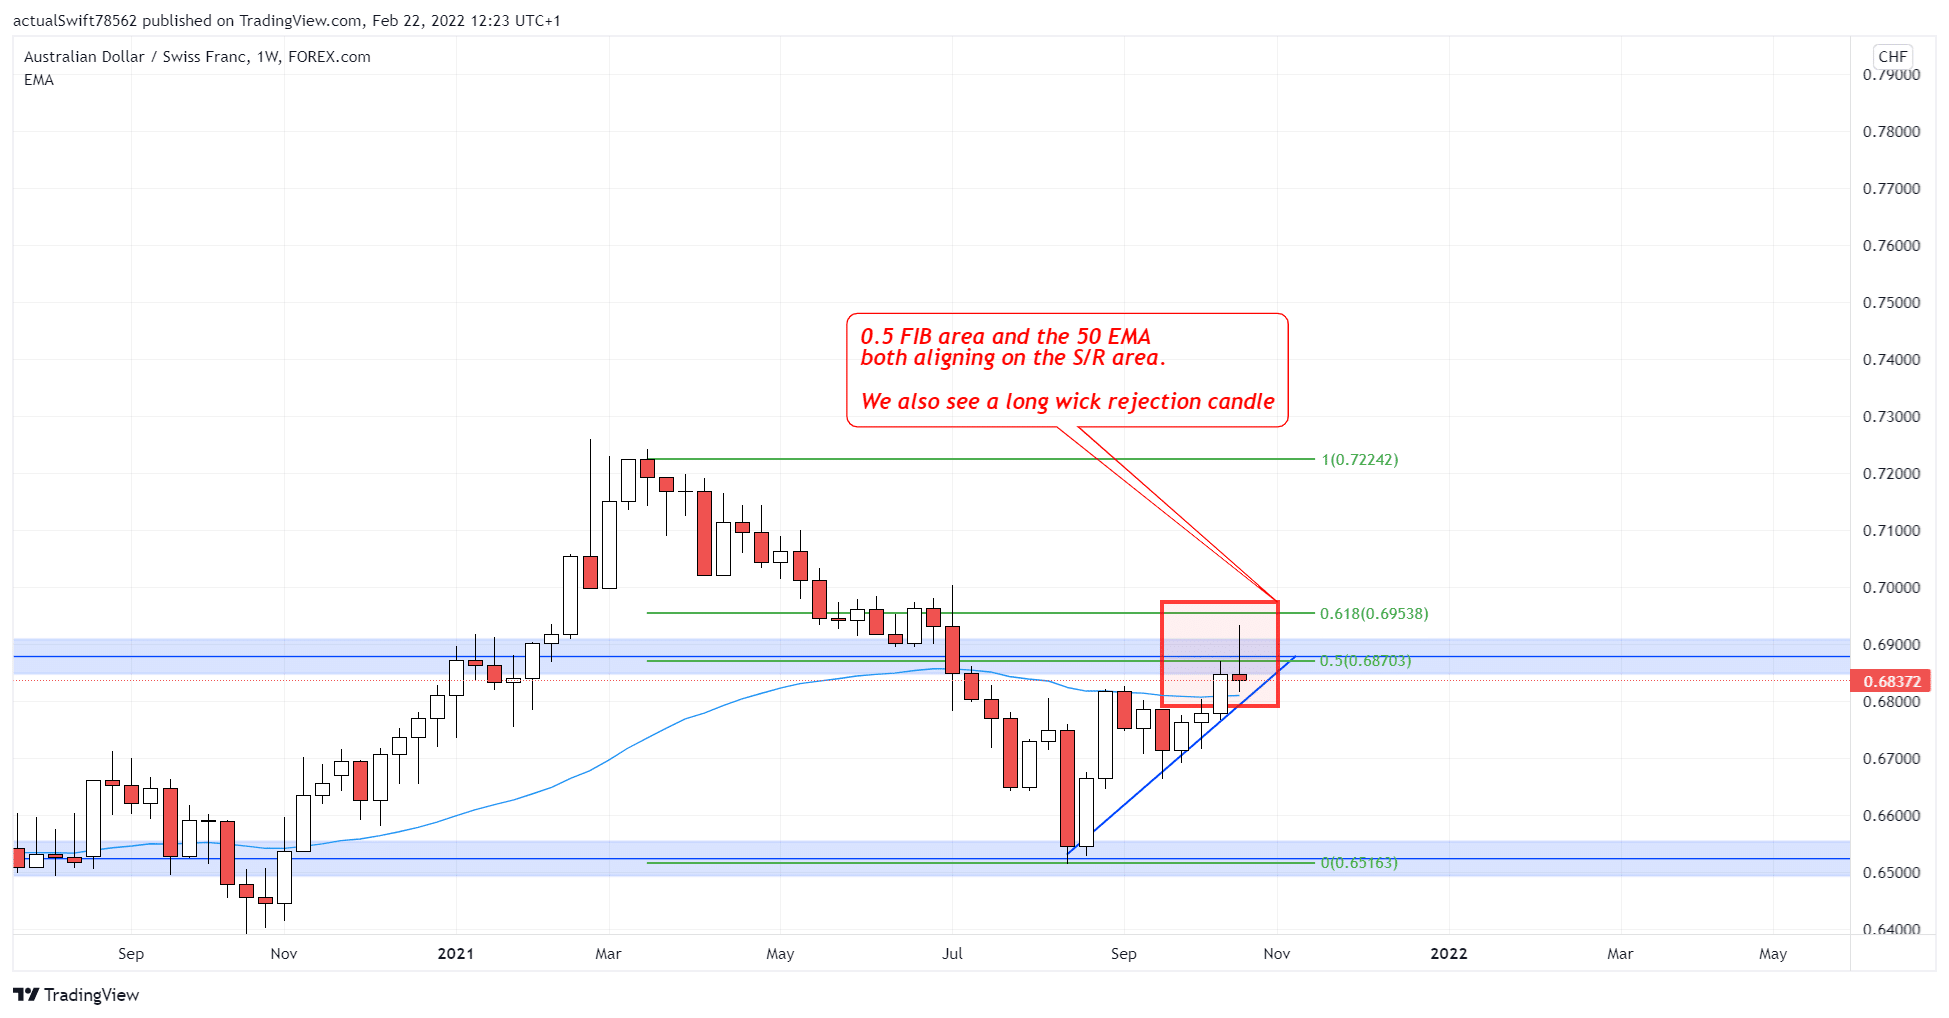
We spotted this setup on the weekly timeframe. We see the price is trending down. It broke the S/R area and then made a pullback. We saw 3 things happen at the S/R area
.
The first one was a long wick rejecting the area.
Second thing was; the area aligned with the 0.5 FIB area.
The 50 EMA also aligned with the area.
That gave us a great area to trade from and the long wick rejection candle confirmed our short bias.
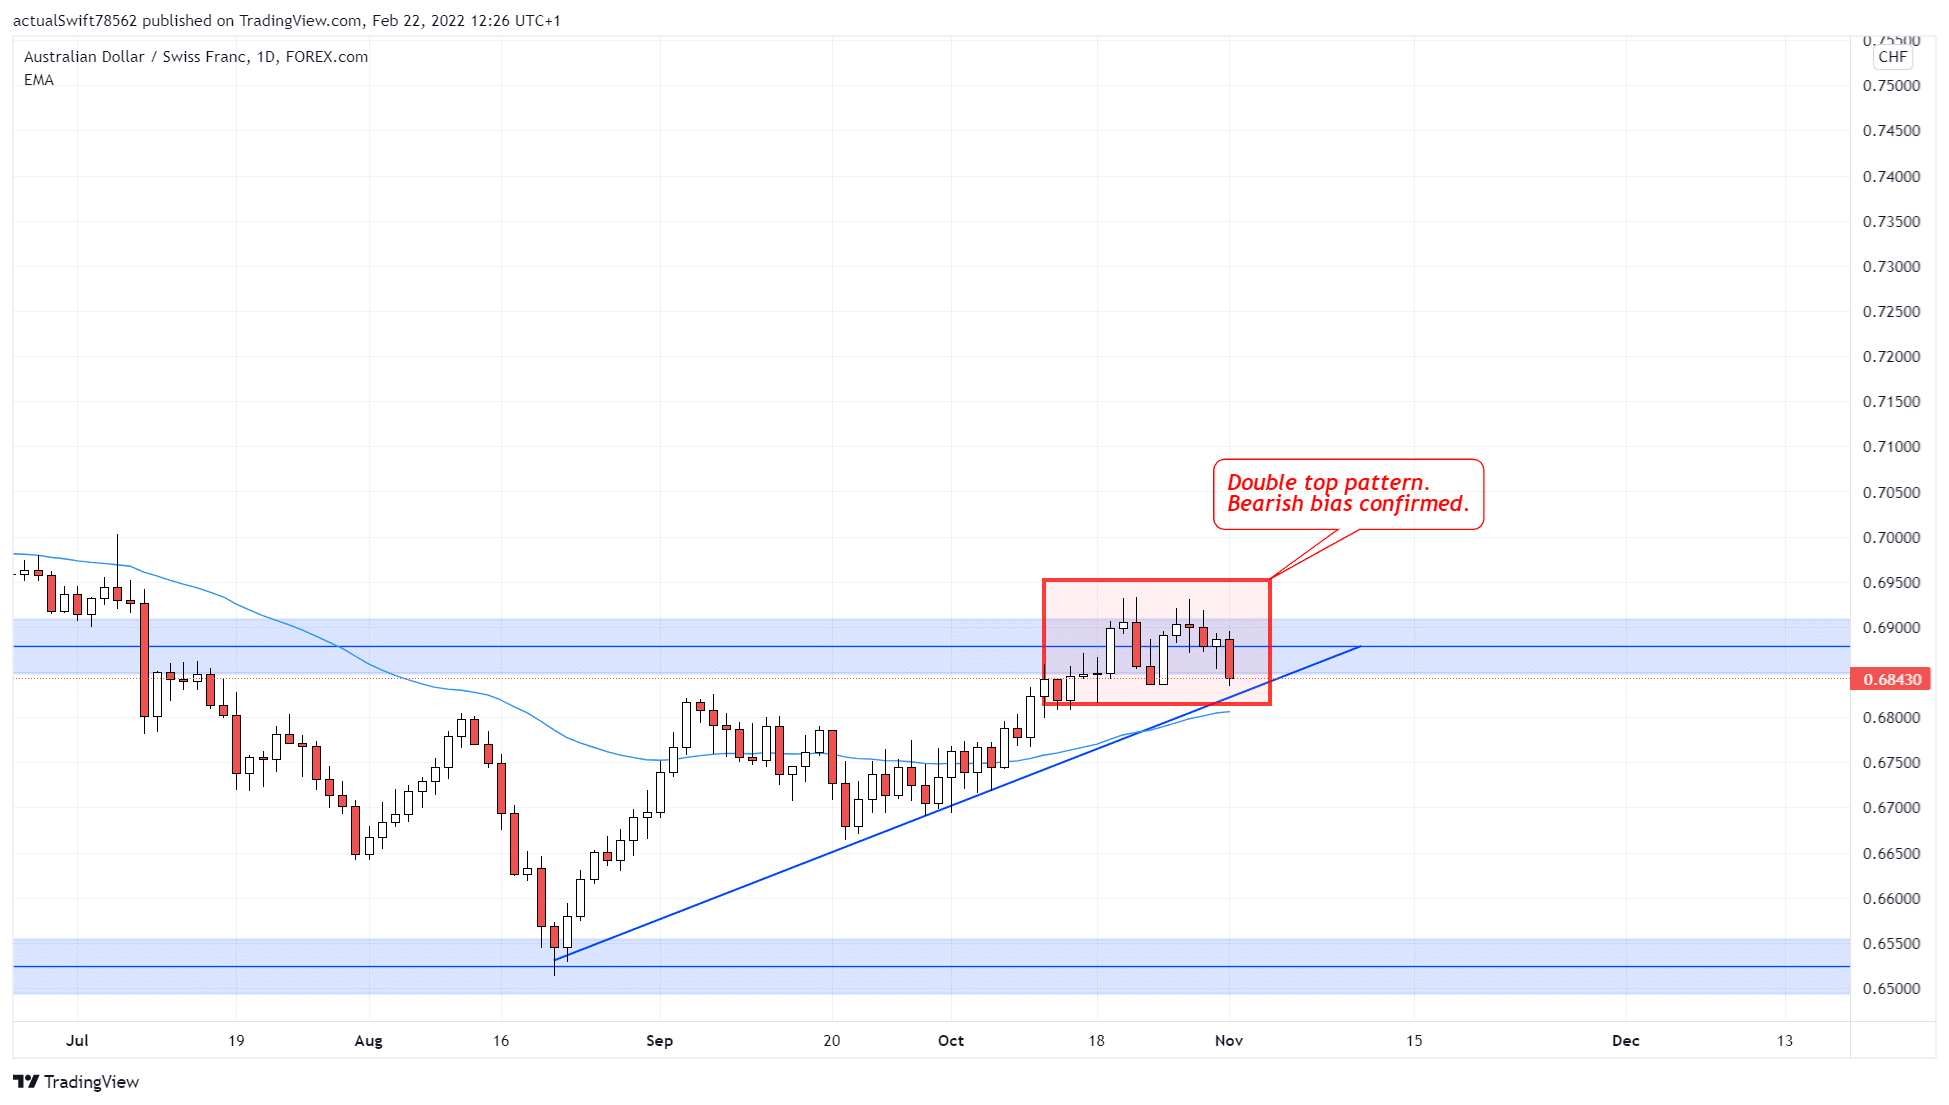
The next time frame that we look at is the daily. There, our short bias was confirmed when we got a double top pattern, which is a bearish pattern.
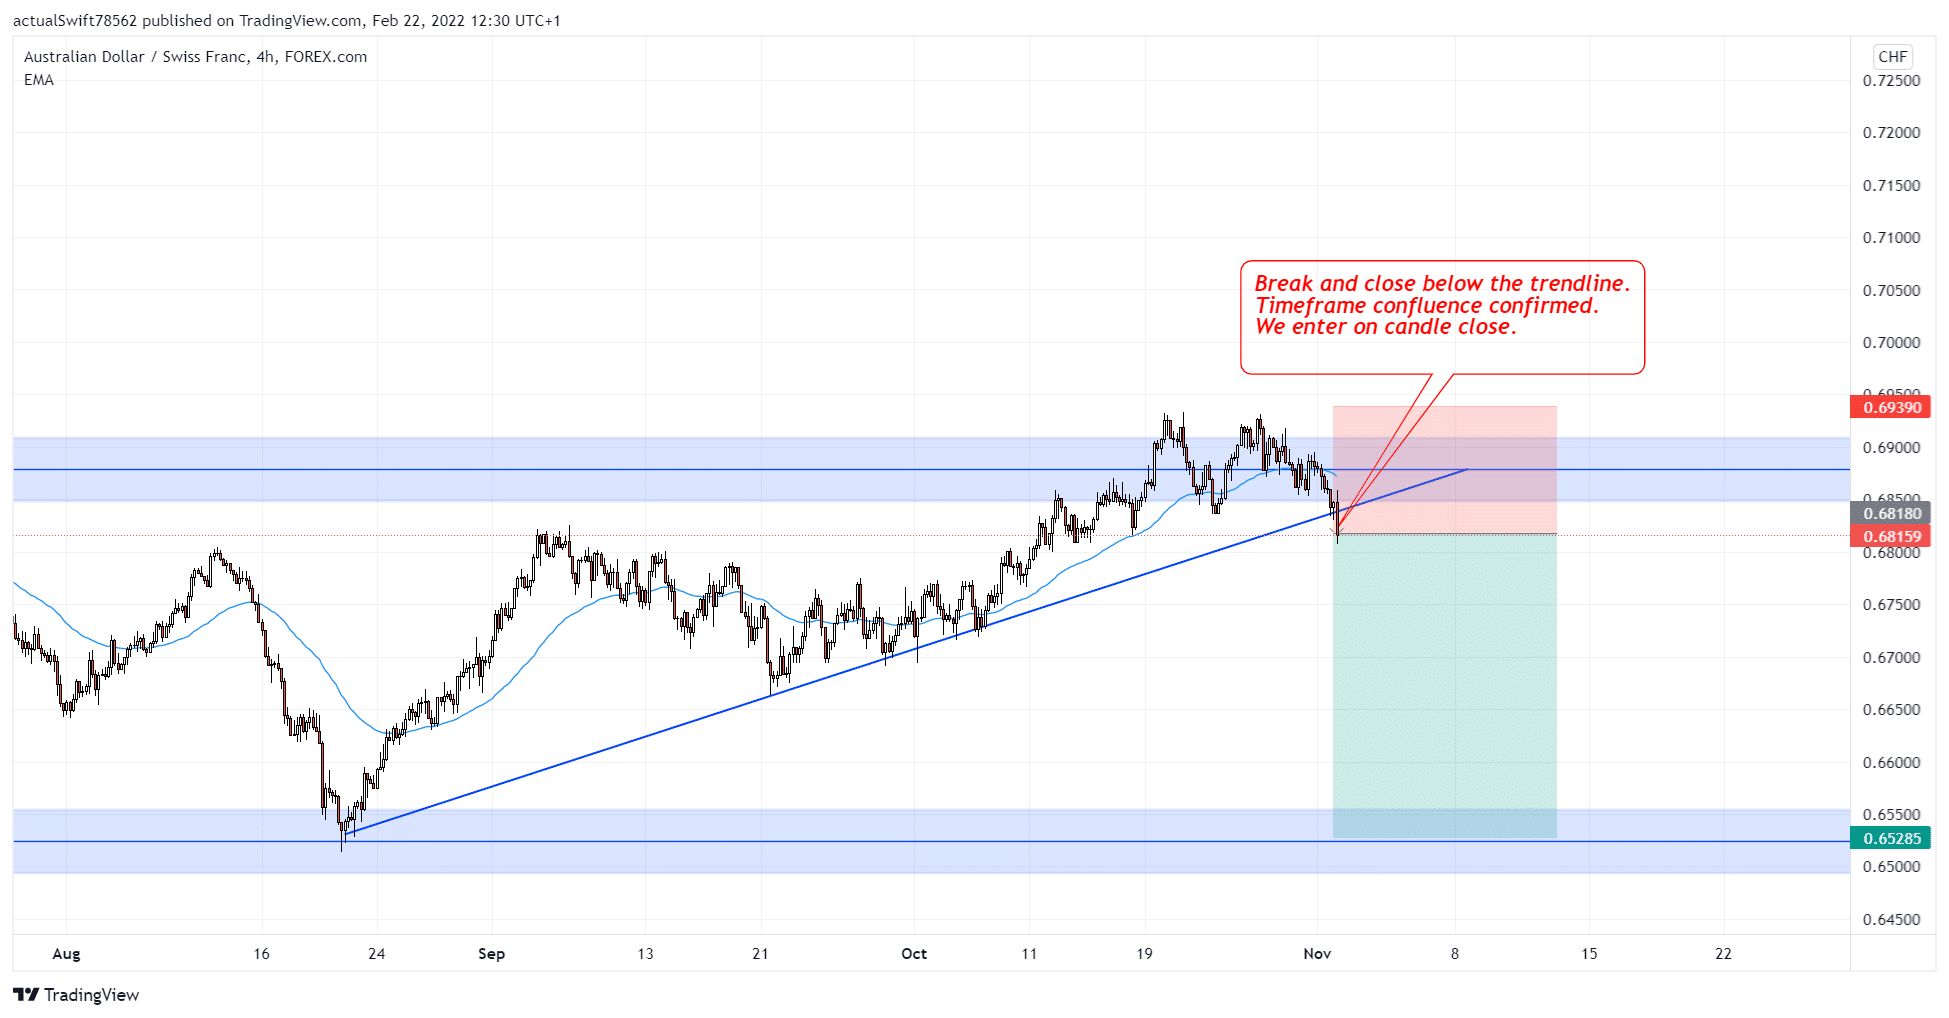
And as usual, the last timeframe we look at is the 4h timeframe. If you haven’t yet, here is where we draw in our trendline.
Our bearish bias and with that, our entry was confirmed when we got a strong break and close below the trendline.
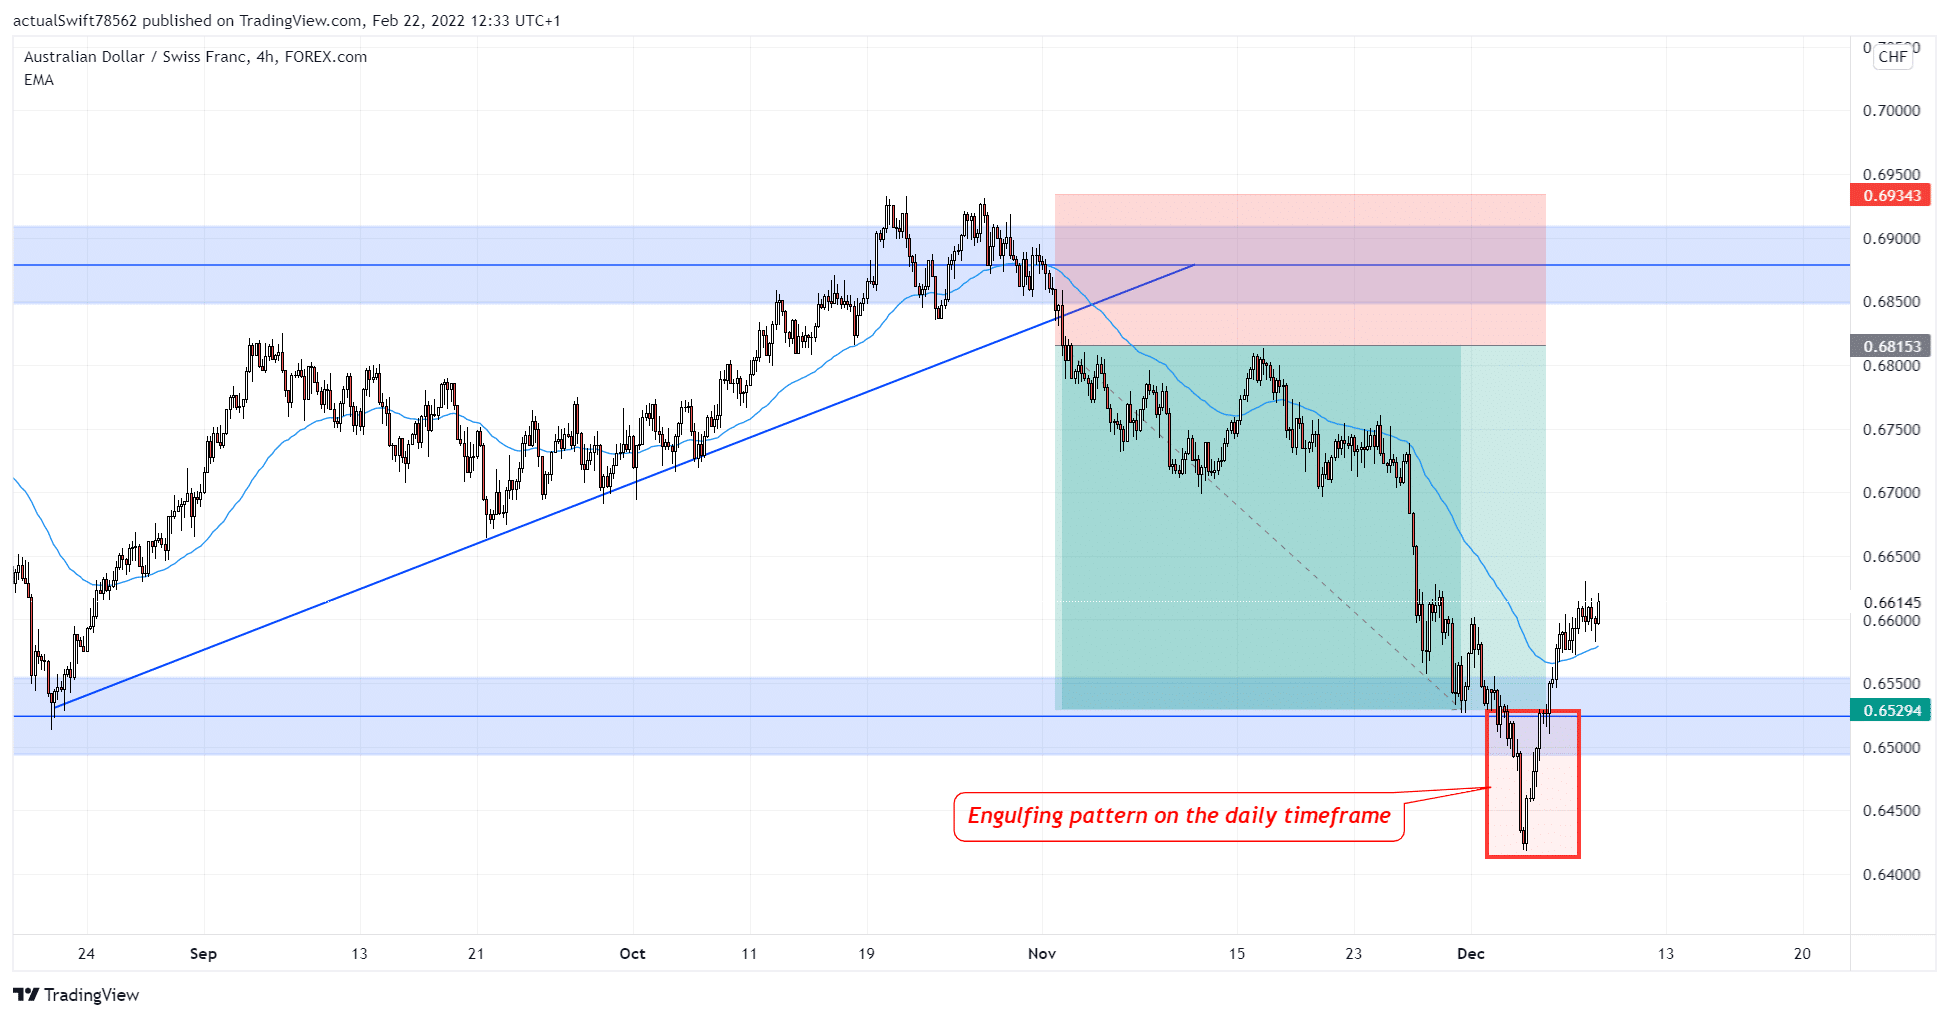
This trade turned into a 2.5:1 trade. We closed the trade when we saw an engulfing pattern appear on the S/R area on the daily timeframe.
CAD/JPY:
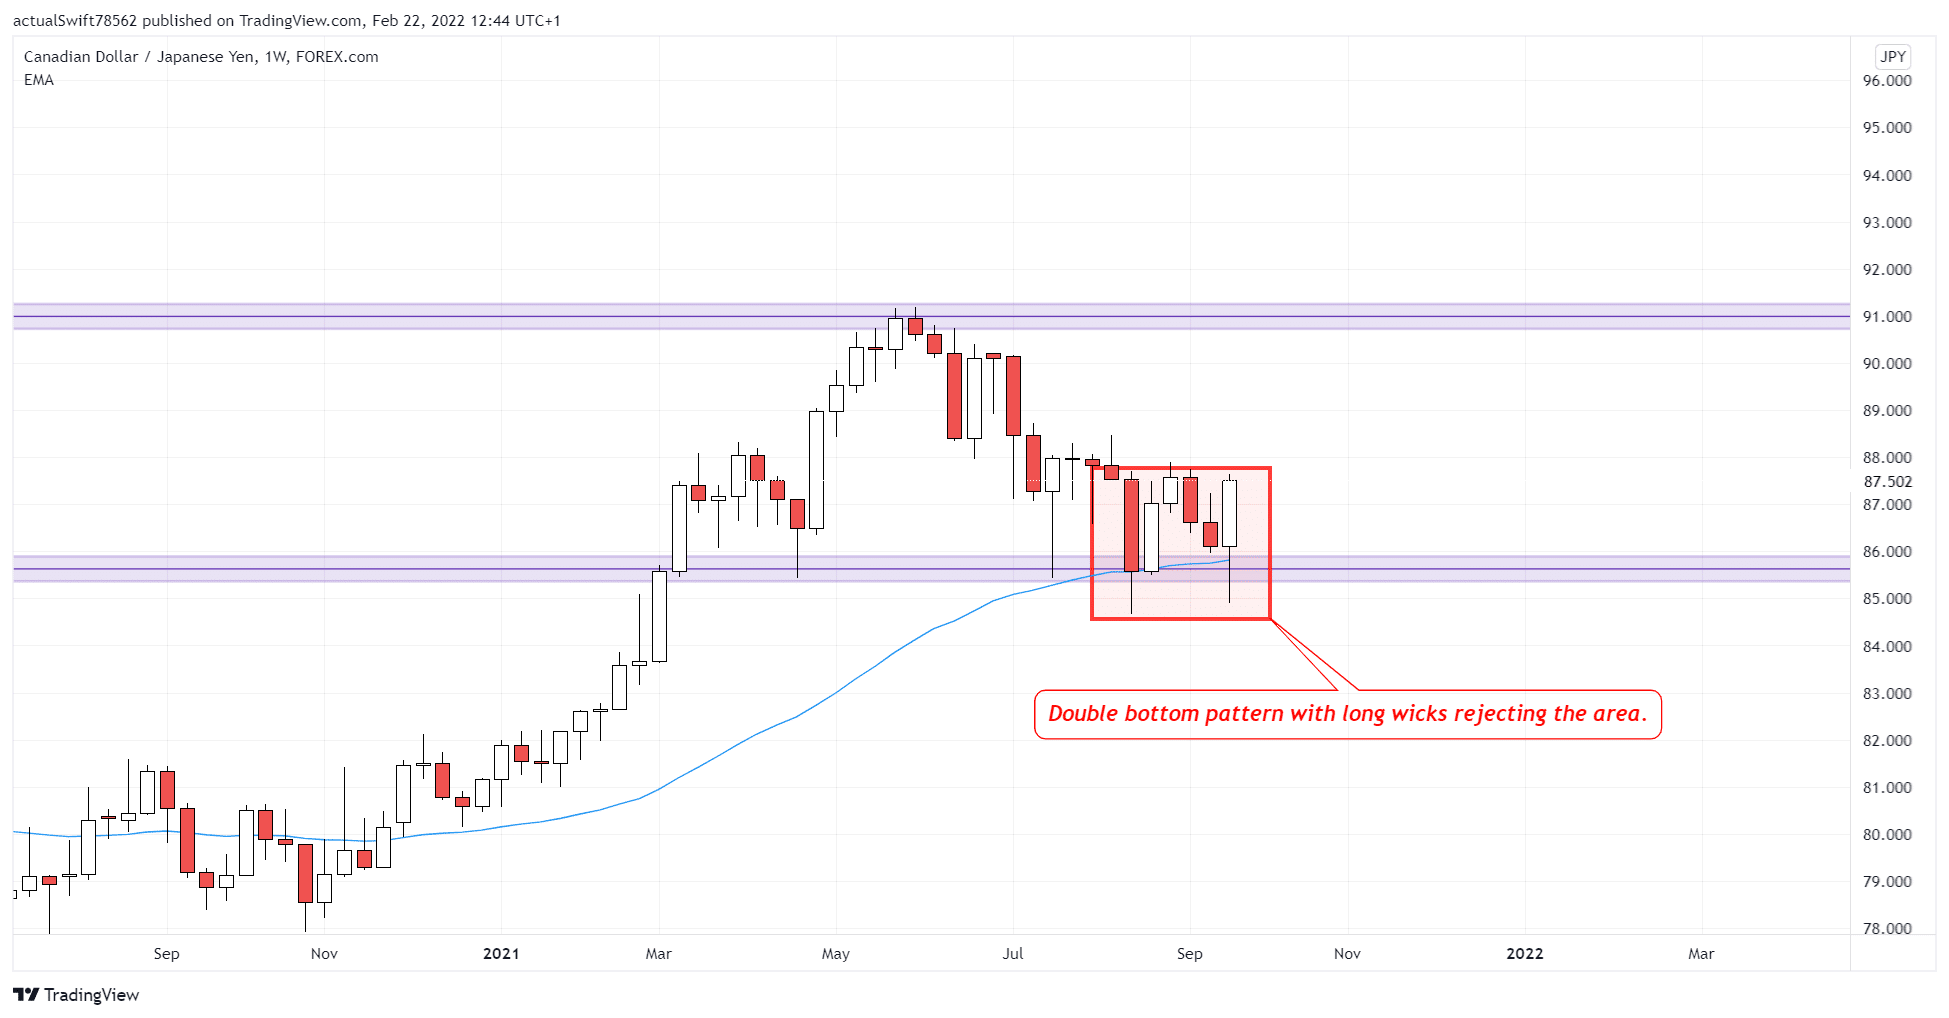
Our next example is going to bed CAD/JPY. We first spotted this setup on the weekly timeframe. We had a double bottom pattern form with long wicks rejecting the area. That gave us a potential long trade.
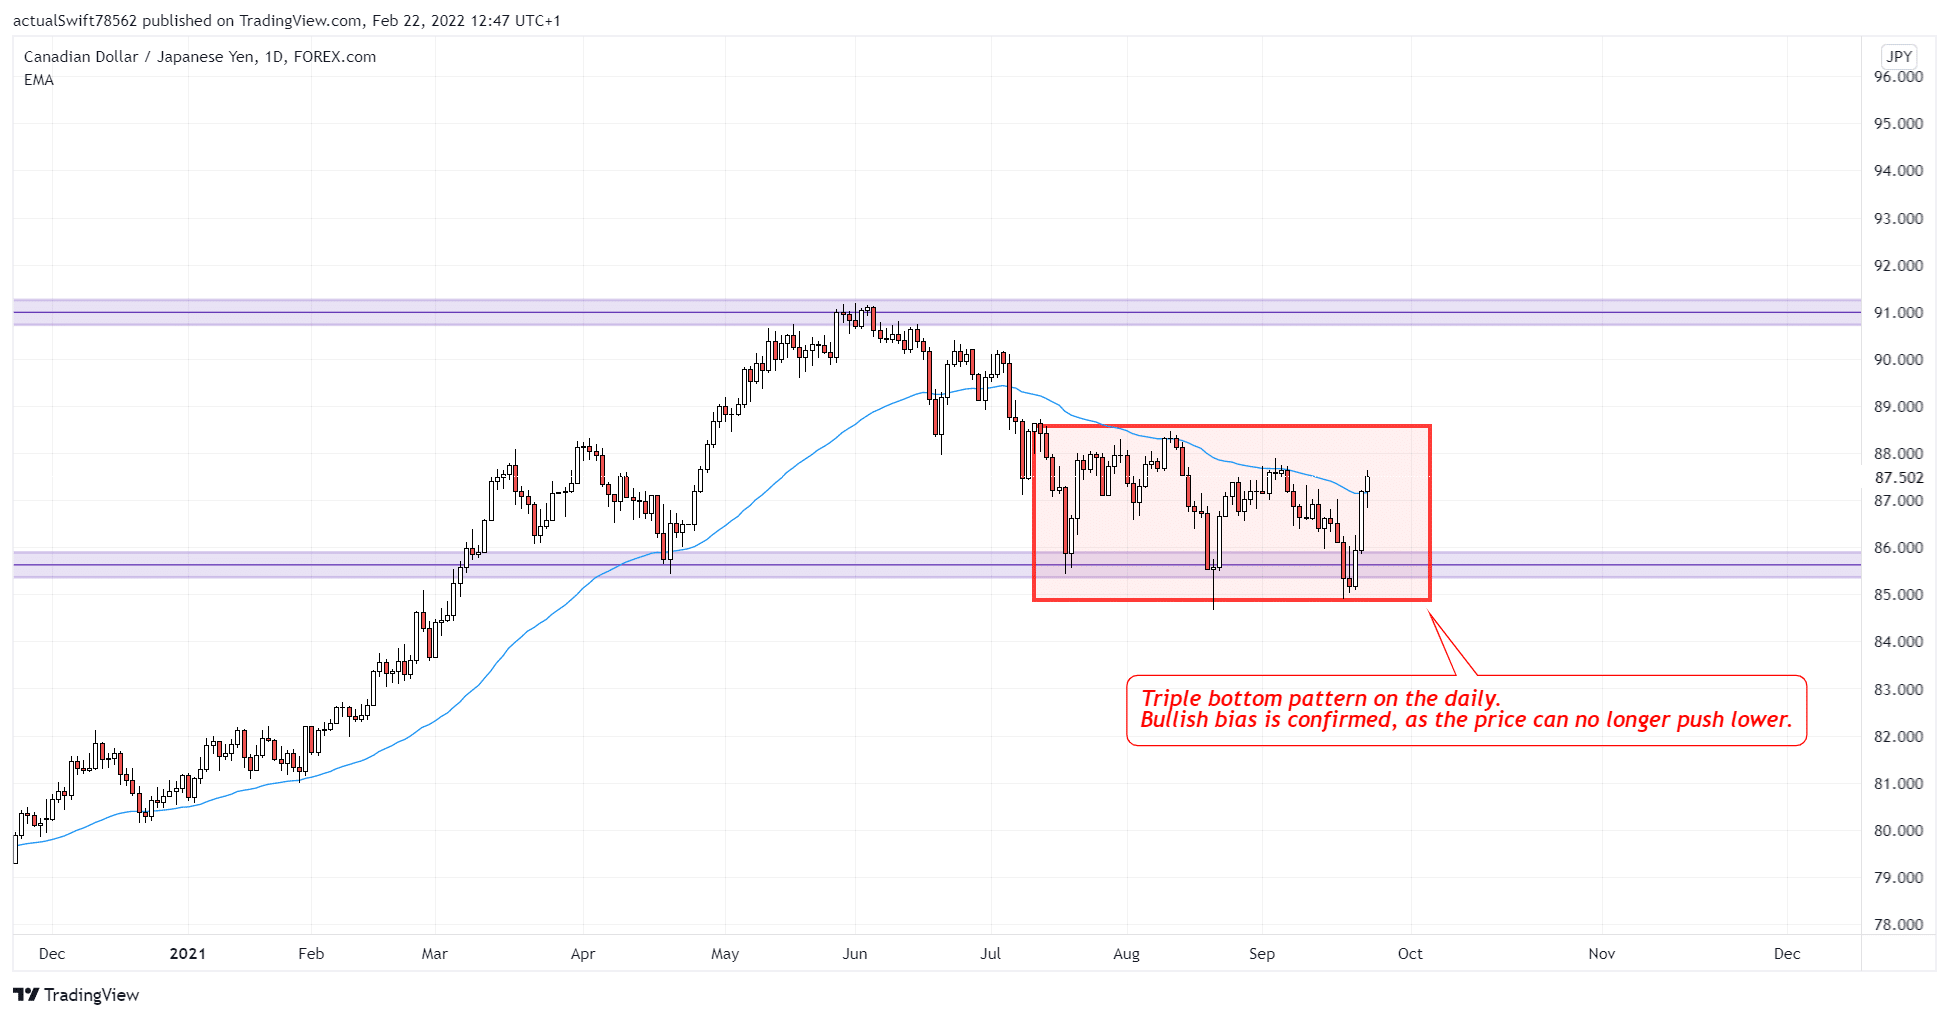
Next, we dropped to the daily timeframe to confirm our bullish bias from the weekly timeframe.
Our bullish bias was confirmed through this nice triple bottom pattern. Which is, of course, a bullish pattern.
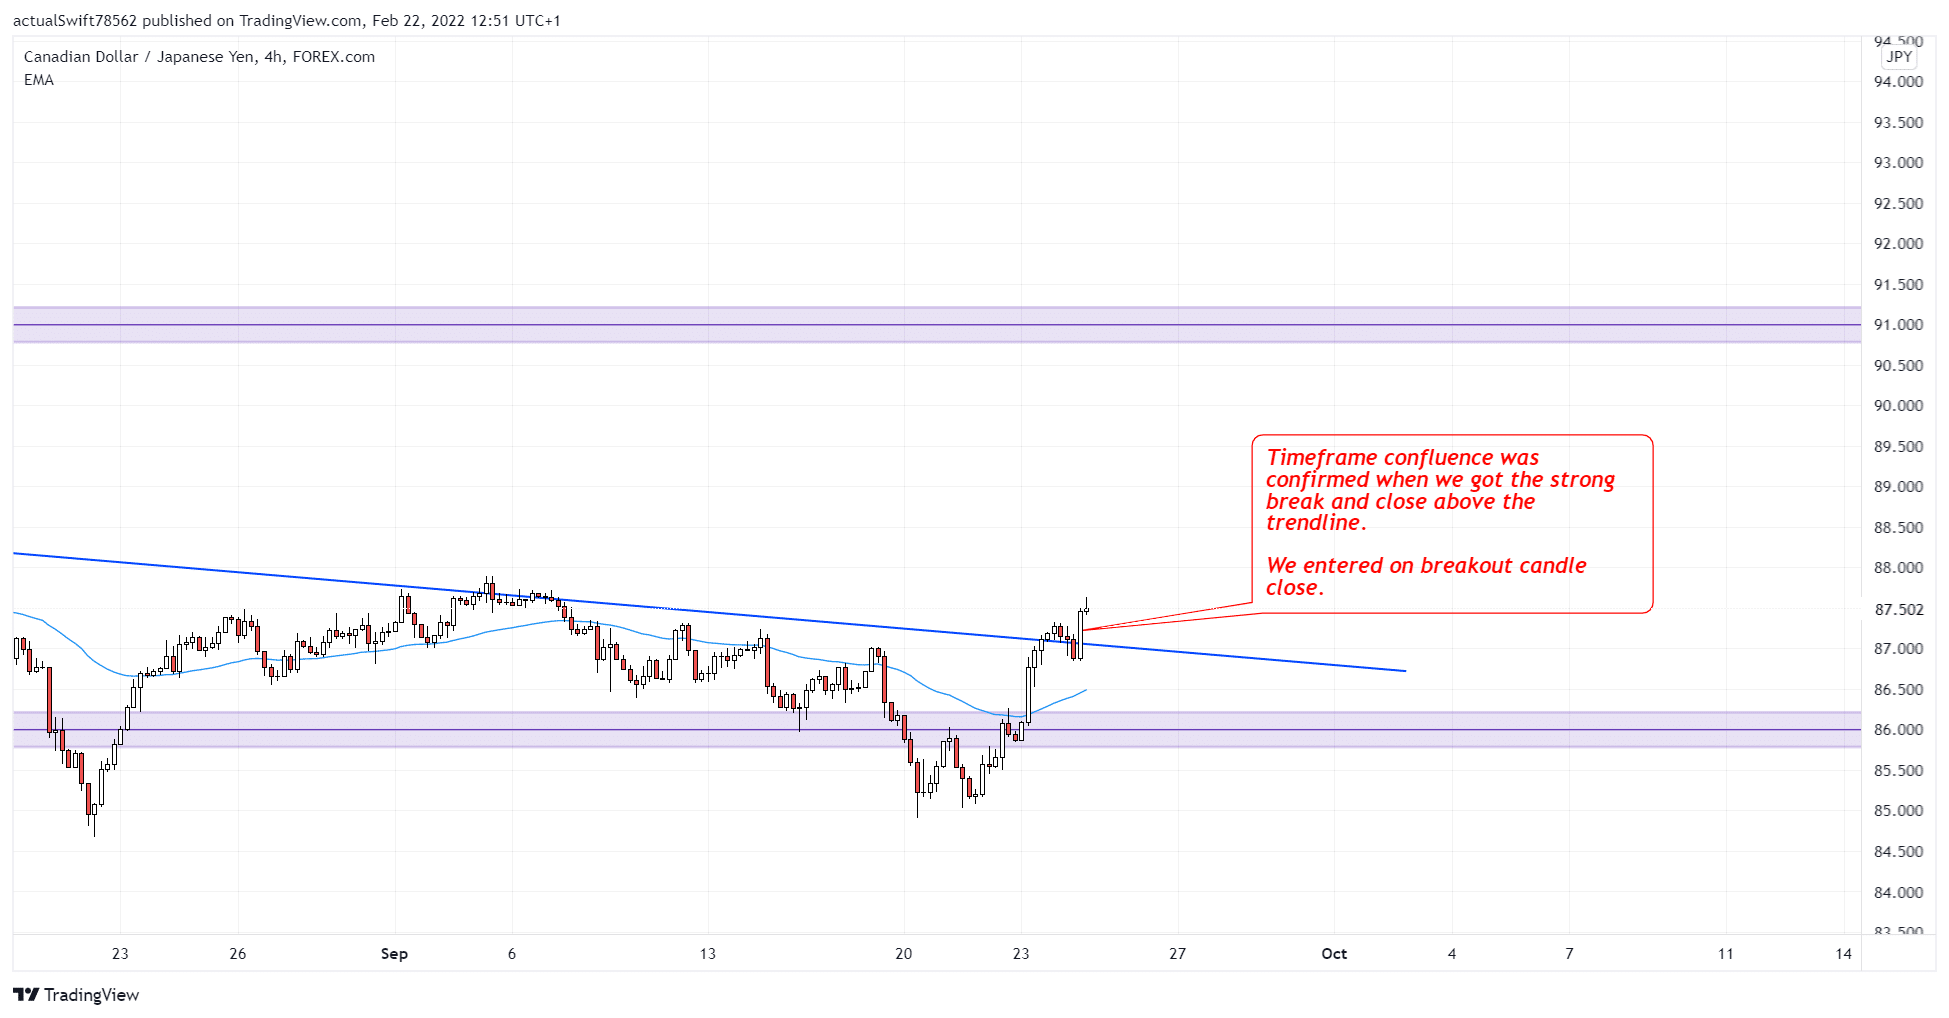
And of course, the last timeframe that we look at. The 4h timeframe.
Here we drew in our trendline. Our timeframe confluence and with that our entry was confirmed when we got this strong break and close above the trendline.
But there is more to this trade. Sometimes we get another entry within the trade the trade.
Here is how we play it out.
If the price makes a pullback back into a strong 4h S/R area and gives us sufficient price action, we enter another position as seen on the chart below.
A second entry allows us to have a much smaller stop loss, because we place it below the entry candle.
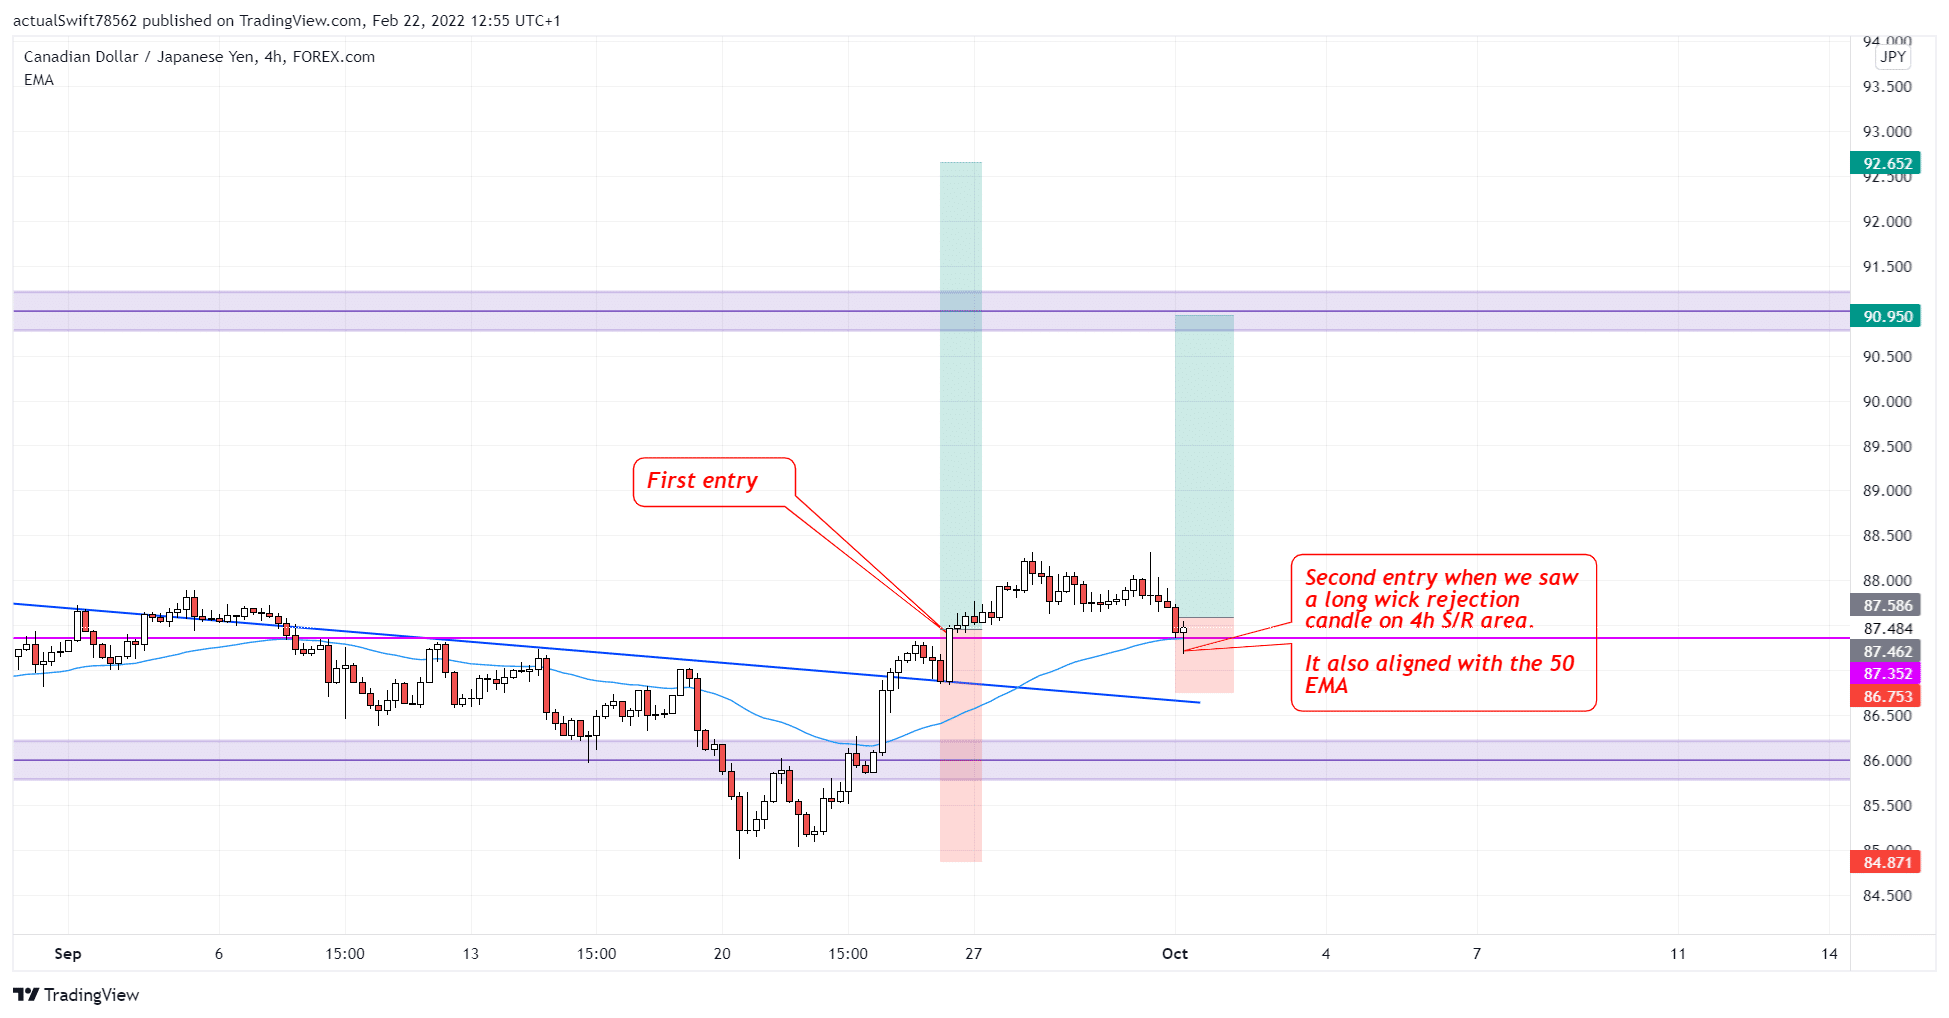
In this case, we also got a 3rd entry.
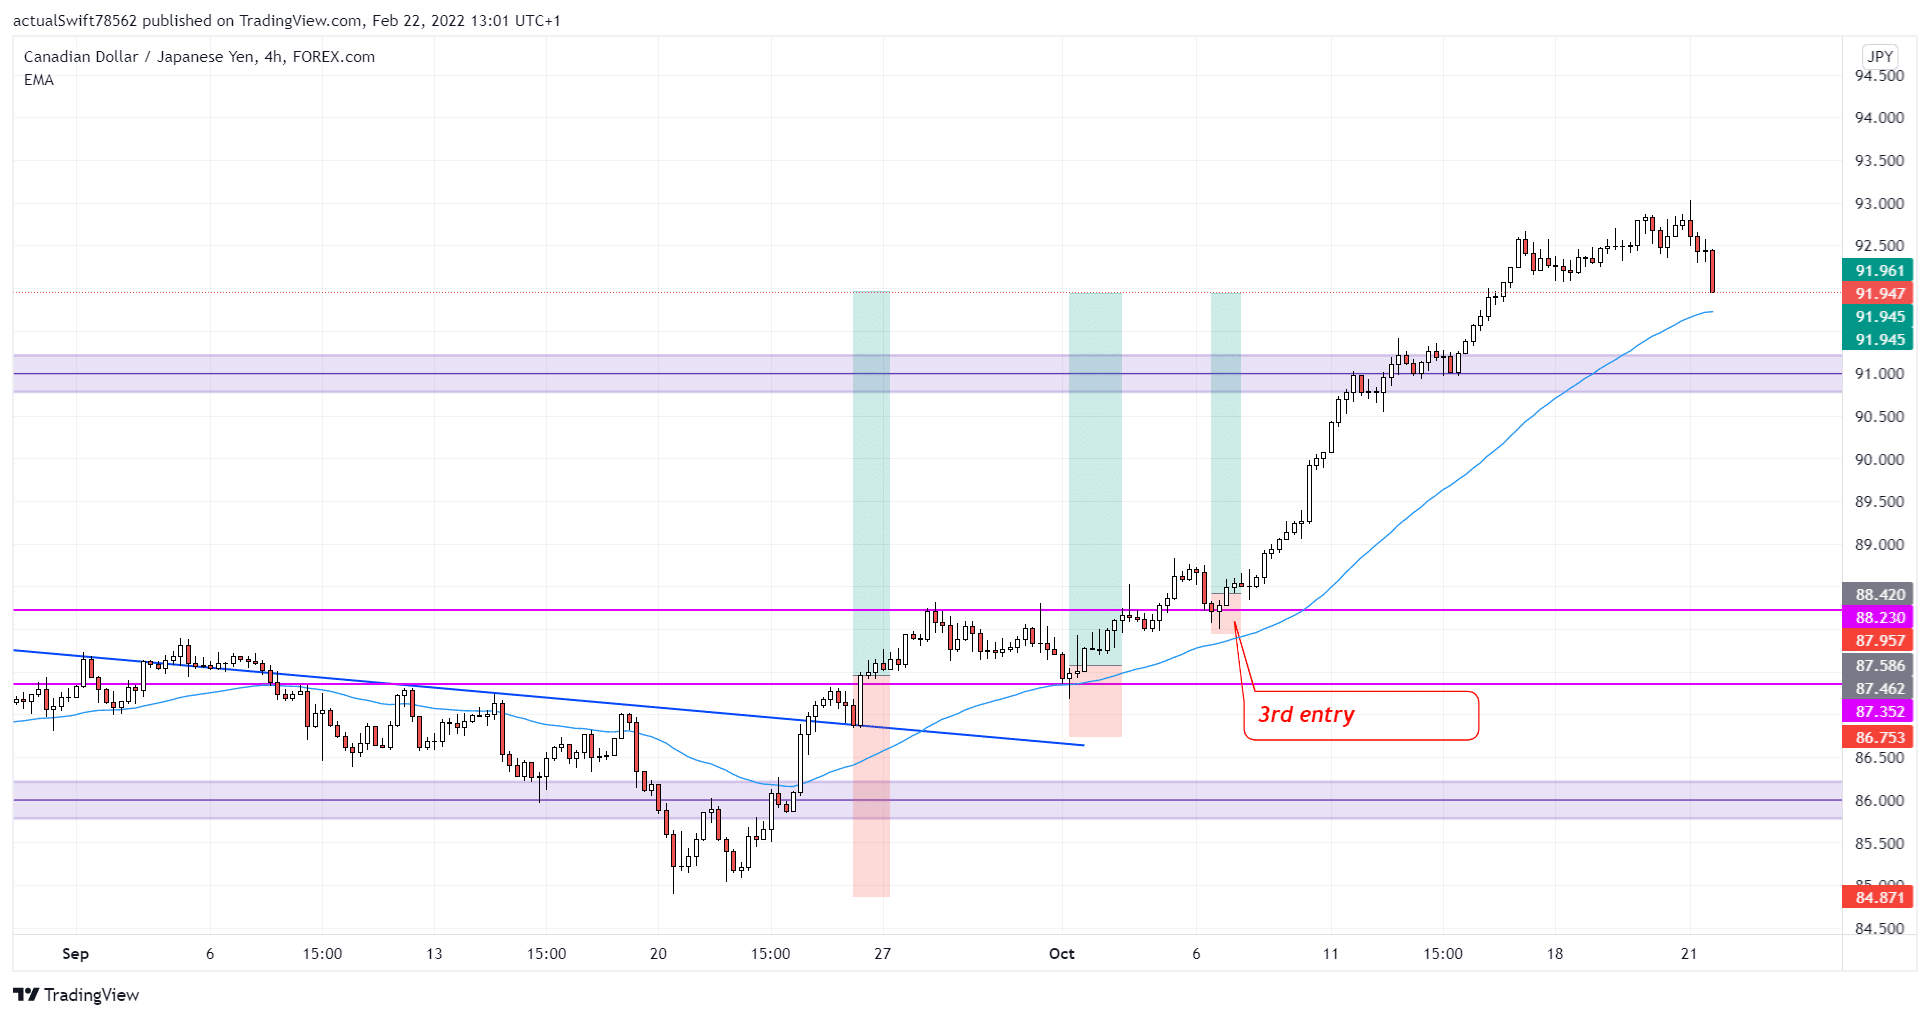
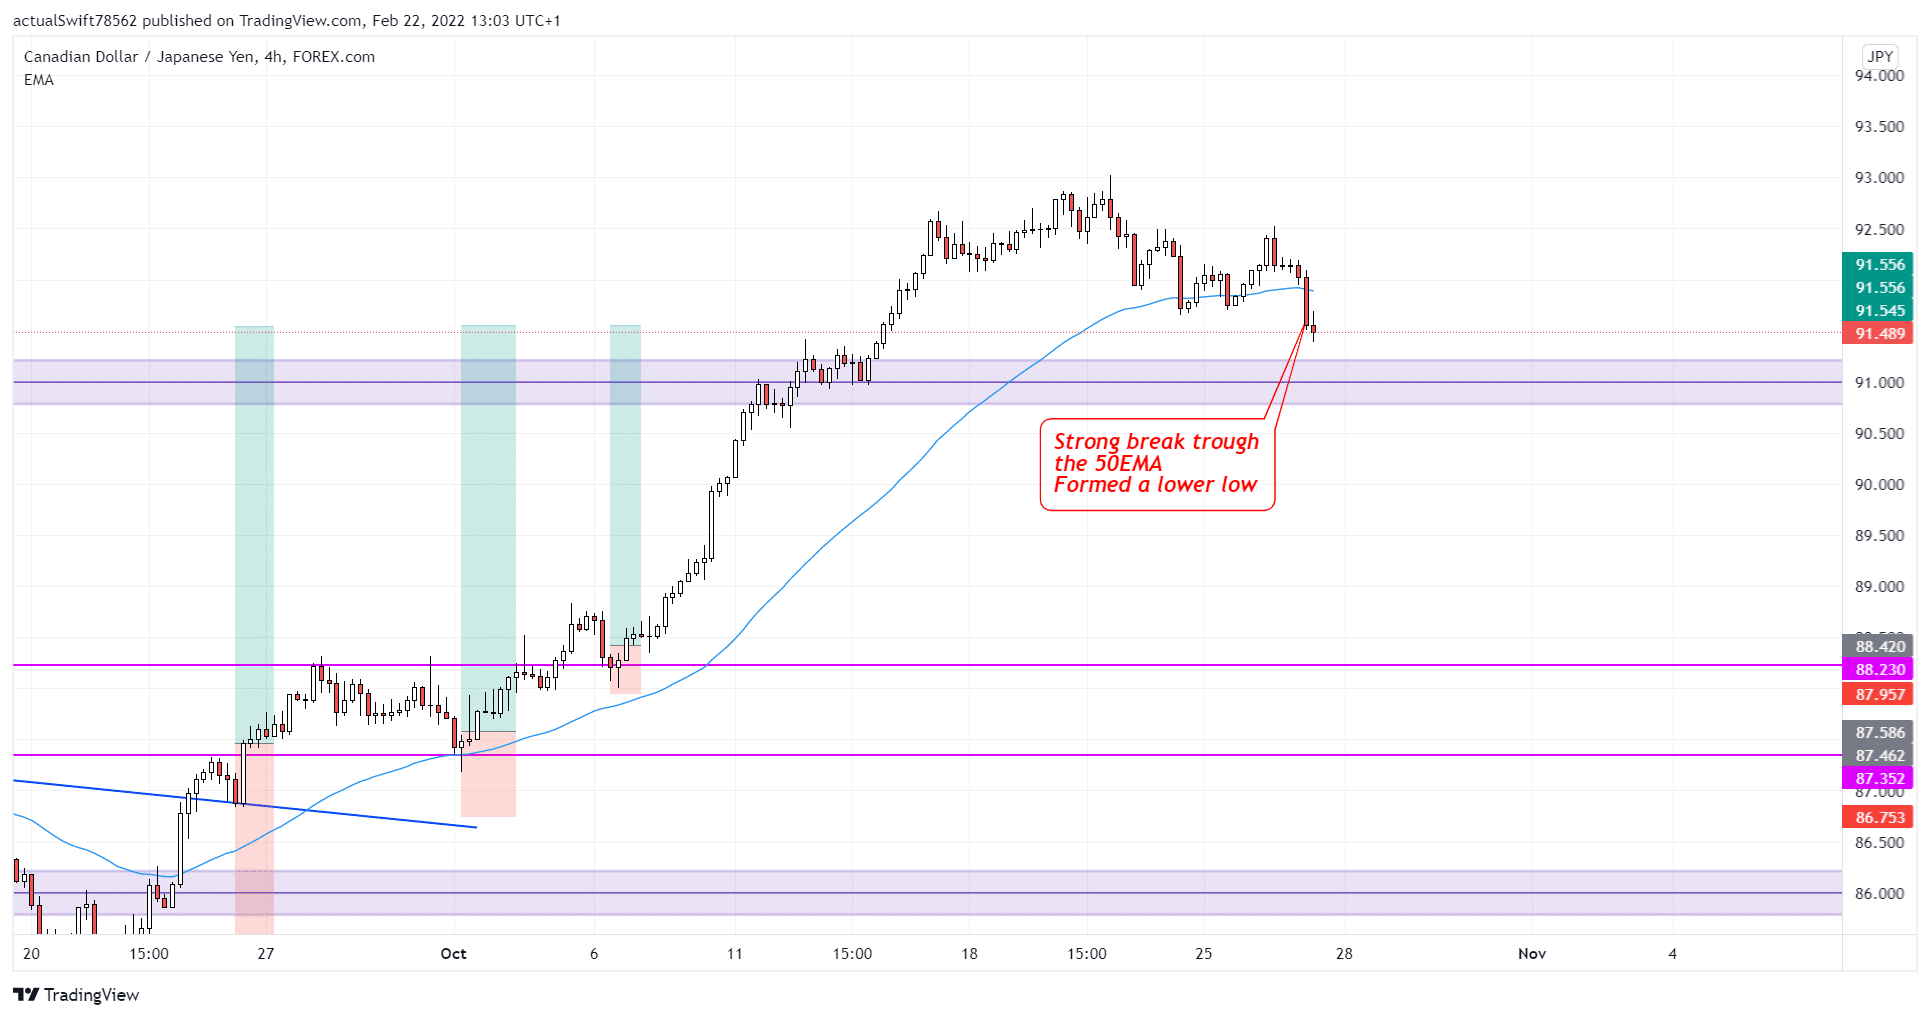
We ended up closing this trade when the price made a strong break below the 50 EMA and formed a lower low.
This was another great trade we took. All positions combined left us with a 13:1 trade. We rarely get opportunities for a 13:1 trade in the forex market, but when we do, we make the best out of it with this strategy.